Expresso provides you with a WYSIWYG editor fieldtype for channel entries. Its main aim is to allow intuitive content editing for your users while respecting your site’s design.
Expresso has been discontinued and is no longer available for sale. Thank you for the continued support over the years. Please consider an alternative add-on.
 Devot:ee AcademEE Awards Fieldtype Runner Up

A WYSIWYG editor should be lightweight and easy to use, and should not break your design. That is what Expresso sets out to do. There is a choice of either a full, basic or light toolbar, although all toolbars only contain the most crucial text editing buttons. You can also create a completely custom toolbar. Strict precautions are in place so that pasting text from word or other sources won’t produce ugly html and won’t mess up your design when viewed on the site. You can define the css to be used within the editor so that the site’s design is reflected there, making it easier to see the end result before publishing.
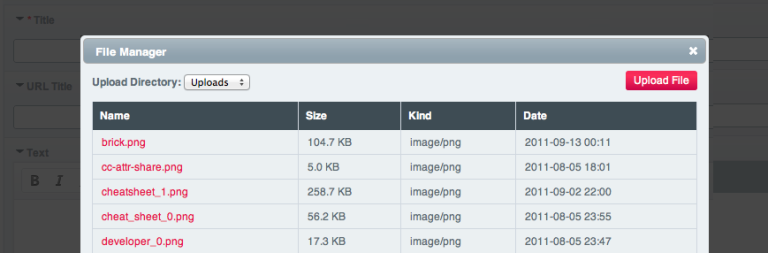
Expresso uses ExpressionEngine’s native file manager so you will feel right at home when uploading and browsing files.
Expresso integrates with NavEE, Structure and Pages and adds links to your pages inside the link dialog. The link, images and other dialogs are also style to match the control panel theme.

Expresso is fully compatible with Matrix, Low Variables, Bloqs, and Content Elements, so you can have full WYSIWYG functionality in your third-party fieldstypes.


Requirements #
Expresso works with ExpressionEngine version 2.10.0 or above, 3.1.0 or above, 4.0.0 and above and 5.0.0 and above.
For ExpressionEngine 2 and 3, you must download and use the legacy version of the add-on from the main add-on page on devot-ee.
Installation #
Download and unzip Expresso, then follow the simple steps below:
- Upload the
user/addons/expressofolder - Upload the
themes/addons/expressofolder - Enable the Expresso add-on
- Open the Expresso add-on settings, enter your license number and make any customisations
- Create a custom channel field and select Expresso as the field type
Updating #
Download and unzip the latest version of Expresso, then follow the steps below:
- Overwrite the
user/addons/expressofolder - Overwrite the
themes/addons/expressofolder - Open the Expresso add-on settings and modify any newly available features
Template Tag Parameters #
You can use parameters to alter the output of your template tag. If your field name is “page_text” then you can use the tag as follows:
{page_text strip_tags="true" allowable_tags="<em><strong>" word_limit="20"}
strip_tags="true"
Strips all html tags from the output
allowable_tags="<em><strong>"
If _striptags is set to true then this parameter allows you to specify what html tags should not be stripped
strip\_line\_breaks="true"
Strips all line breaks, carriage returns and tabs (\n, \r, \t) from the html source code
character_limit="100"
Limits the output to the specified number of characters
word_limit="20"
Limits the output to the specified number of words
paragraph_limit="1"
Limits the output to the specified number of paragraphs
Content Elements Support #
Expresso works with Content Elements seamlessly. You can output the contents of your Expresso field using the {expresso} tag pair as follows:
{ce_field}
  {expresso}
    {element_name}: {value}
  {/expresso}
{/ce_field}
element_name
The name of the Expresso element
value
The contents of the Expresso element
CKEditor Plugins & Language #
You can manually install any CKEditor plugins you want as follows:
Upload the plugin into the
themes/user/expresso/ckeditor4.x.x/pluginsfolderEdit
themes/user/expresso/javascript/expresso.jsand add the plugin name to the list of extra plugins in following line:extraPlugins: "headers,mediaembed,autogrow",
You can change the language of CKEditor as follows:
Edit
themes/user/expresso/javascript/expresso.jsand add thelanguageattribue as follows:var defaults = { language: "de",Possible values are:
af, ar, bg, bn, bs, ca, cs, cy, da, de, el, en-au, en-ca, en-gb, en, eo, es, et, eu, fa, fi, fo, fr-ca, fr, gl, gu, he, hi, hr, hu, is, it, ja, ka, km, ko, ku, lt, lv, mk, mn, ms, nb, nl, no, pl, pt-br, pt, ro, ru, sk, sl, sq, sr-latn, sr, sv, th, tr, ug, uk, vi, zh-cn, zh
Global Field Settings #
You can customise a number of things including the toolbar in the global field settings
(Control Panel > Add-Ons > Fieldtypes > Expresso):
License Number
Enter your license number here
Toolbar Icons
Select the icons that should appear in the toolbar
Header Styles
Select the header styles that should appear in the toolbar
Make Editor Full Width
Set to enabled to make the editor fill the width of the field
Outline Blocks by Default
Set to enabled to outline blocks by default
Additional Entities to Escape
Add any entities that should be escaped
Channel URIs
Add a URI for each channel to make its entries linkable in the editor. Leave blank to exclude a channel.
CSS
Any CSS code you add here will be applied to the Expresso WYSIWYG editor (it will not be applied to the rendered content). You can also add the url to a CSS file if you prefer.
Custom Toolbar
You can create a custom toolbar by manually entering code in the following format (see the CKEditor toolbar docs for all toolbar icons)
[ "Bold", "Italic", "Underline", "Strike", "Subscript", "Superscript" ],
[ "Link", "Unlink", "Anchor" ],
[ "Image", "Flash", "Table", "HorizontalRule", "Iframe" ]
Styles
You can create custom styles by manually entering code in the following format (see the CKEditor styles docs)
{ name: "Red Title" , element: "h3", styles: { "color": "Red" } },
{ name: "CSS Style", element: "span", attributes: { "class": "my_style" } },
{ name: "Marker: Yellow", element: "span", styles: { "background-color": "Yellow" } }
Individual Field Settings #
You can customise a number of things specific to an Expresso field in the individual field settings at Control Panel → Admin → Channel Administration → Channel Fields:
Toolbar
Select whether to display the full (all selected icons), basic (only basic icons), light (minimal set of icons) or custom toolbar (as defined in the global settings)
CSS
Any CSS code you add here will be applied to the Expresso WYSIWYG editor in addition to any CSS code you added in the global field settings (it will not be applied to the rendered content). You can also add the url to a CSS file if you prefer.
Changelog #
Version 5.3.1 #
- Fixed wrong CKEditor version number in settings.
Version 5.3.0 #
- Updated CKEditor to 4.11.3.
- Fixed issues with RTE and Live Preview.
Version 5.2.0 #
- Added compatibility with live preview (requires EE 4.3.4 or above).
Version 5.1.0 #
- Added relative URL’s setting
- Fixed bug with matrix integration
Version 5.0.3 #
- Fixed deprecation error in PHP 7.2
Version 5.0.2 #
- Fixed use of null coalescing operator (PHP7 only)
Version 5.0.1 #
- Fixed bug with grid fieldtype
Version 5.0.0 #
- Made compatible with ExpressionEngine 4
Version 4.2.9 #
- Removed relative URL converting in replace tag method
Version 4.2.8 #
- Fixed relative URL in image dialog
Version 4.2.7 #
- Fixed settings that would not save when left blank
- Removed dummy image preview text
Version 4.2.6 #
- Fixed PHP error that could appear after creating a new site in MSM
- Fixed filepicker modal issue in image dialog
Version 4.2.5 #
- Added relative URL’s to file picker
- Fixed filepicker modal issue in full screen mode
- Fixed full width issue in grid fieldtype
Version 4.2.4 #
- Added support for Bloqs
- Fixed PHP notices when used inside Low Variables
Version 4.2.3 #
- Fixed file browser modal window in full screen mode
- Restored compatibility with PHP 5.3.x
Version 4.2.2 #
- Replaced missing file in previous version
Version 4.2.1 #
- Pages list now appears in alphabetical order
Version 4.2.0 #
- Added a channel URI setting which gives the ability to make entries linkable within the editor
- Updated CKEditor to version 4.5.10
- Fixed compatibility issues with Low Variables add-on
Version 4.1.1 #
- Made compatible with PHP 7.0.0
Version 4.1.0 #
- Added global setting to make editor full width
- Fixed bug with source code height in full screen mode
- Fixed incorrect toolbar icons in global settings
Version 4.0.5 #
- Fixed error that appears in debugging mode
Version 4.0.4 #
- Fixed bug with NavEE compatibility
Version 4.0.3 #
- Fixed bug with field validation on publish page
Version 4.0.2 #
- Fixed bug in Grid fieldtype settings
Version 4.0.1 #
- Fixed bug with file browser
Version 4.0.0 #
- Made compatible with ExpressionEngine 3
End of feature development for EE2 version #
Version 3.5.0 #
- Added a channel URI setting which gives the ability to make entries linkable within the editor
- Added compatibility with PHP7
Version 3.4.8 #
- Fix for Expresso appearing inside of a Matrix field inside of a Low Variables field
Version 3.4.7 #
- Fix for potential missing slashes in link dialog for Pages, NavEE and Structure links
Version 3.4.6 #
- Added {site_index} tag to generated links
Version 3.4.5 #
- Updated CKEditor to version 4.4.7
- Updated CKEditor docs links
Version 3.4.4 #
- Added backward compatibility support for templates with empty Content Elements tag pair
Version 3.4.3 #
- Added tag pair support for Content Elements with {element_name} and {value} tags
Version 3.4.2 #
- Fixed bug with Content Elements
Version 3.4.1 #
- Readded missing CKEditor plugins
- Readded missing toolbar icons on settings page
- Readded advanced dialog tab
Version 3.4.0 #
- Updated to CKEditor 4.4.5 (release notes)
- Fixed bug with IE11
Version 3.3.3 #
- Added ability to outline blocks by default
- Added ability to edit additional entities to escape
Version 3.3.2 #
- Added subscript and superscript toolbar options
Version 3.3.1 #
- Added toolbar select field to Content Elements fieldtype settings
Version 3.3 #
- Added compatibility for Content Elements add-on
Version 3.2.4 #
- Fixed bug with IE11
Version 3.2.3 #
- Fixed bug where ShowBlocks and Source icons would be missing
Version 3.2.2 #
- Fixed php error
Version 3.2.1 #
- Fixed bug in global settings retrieval
Version 3.2 #
- Added compatibility for Grid
Version 3.1.7 #
- Fixed bug with changing the order of Matrix rows that contain Expresso fields
Version 3.1.6 #
- Protocol in link dialog automatically changes to
otherwhen using Pages/Structure/Navee dropdown
Version 3.1.5 #
- Fixed bug with setting language
Version 3.1.4 #
- Updated link dialog to use {site_url} instead of absolute url
Version 3.1.3 #
- Made compatible with EE 2.6.0
Version 3.1.2 #
- Fixed bug where header tags lost their styling
Version 3.1.1 #
- Fixed typos in folder name
Version 3.1 #
- Updated to CKEditor 4.1 (release notes)
- Set jqueryOverrideVal config variable to false
Version 3.0.2 #
- Fixed bug in media embed plugin
Version 3.0.1 #
- Fixed bug that sometimes showed PHP error
Version 3.0 #
- Updated to CKEditor 4 (release notes) with Moono theme
- Added media plugin and toolbar icon
- Added autogrow plugin
- Added strip_line_breaks tag
- Removed height from global and field settings
- Removed video plugin and toolbar icon
- Removed background colour from settings
Version 2.3 #
- Added support for having a moved third-party theme folder
Version 2.2 #
- Fixed bug with extra links from third-party add-ons
Version 2.1.2 #
- Fixed bug with declaration of CKEditor plugin
Version 2.1.1 #
- Made editor resizable
- Fixed bug with missing CKEditor plugin
Version 2.1 #
- Added HTML5 video icon and dialog
- Added check that upload destinations exist
- Changed to EE’s built-in generate_json method
- Fixed bug with paragraph limiter
- Fixed bug with Better Workflow
Version 2.0 #
- Brand new “silk” theme (attributions)
- Added import and export of settings
- Added anchor icon
- Made compatible with Better Workflow v1.2
- Bugfix when saving settings in Low Variables
Version 1.9 #
- Added template tag parameters (strip_tags, allowable_tags, character_limit, word_limit, paragraph_limit)
- Added paste from word icon
- Removed text colour icon
- Fixed misspelled folder in zip file
Version 1.8.1 #
- Added Indent and Outdent buttons
Version 1.8 #
- Added customisable toolbar
- Changed design of global settings page
Version 1.7.2 #
- Fixed stability issue in link dialog
Version 1.7.1 #
- Bugfix for Safecracker in EE 2.3
- Bugfix for font colour dialog
Version 1.7 #
- Added support for Low Variables
Version 1.6.2 #
- Bugfixes when using Expresso in Matrix and Safecracker
Version 1.6.1 #
- Added PEAR JSON library to support systems running PHP versions older than 5.2.0
Version 1.6 #
- Added support for NavEE (version 2.1.2 and above), Structure and Pages in link dialog
- Added “Browse Files” button to link and image dialogs
- Added light toolbox (minimal set of icons)
- File manager dropdown removed from field settings
- Updated CKEditor to version 3.6.2
Version 1.5.1 #
- Added Maximize icon
- Updated CKEditor to version 3.6.1
- Bugfixes
Version 1.5 #
- Compatible with EE2.2.1
Version 1.4.2 #
- Bugfixes
Version 1.4.1 #
- Bugfixes
Version 1.4 #
- Added full support for Matrix
- Improved efficiency of generated code
Version 1.3 #
- Partly added support for Matrix fields
- Added toolbar icons
Version 1.2.3 #
- Bugfix in IE
Version 1.2.2 #
- Bugfix in File Manager
Version 1.2 #
- Added EE styled dialogs when adding links and images
- Replaced Upload Destination with File Manager yes/no selection
- Added functionality to Remove Format button
Version 1.1.1 #
- Fixed bug with white overlay not closing
- Fixed bug with toolbar icons
Version 1.1 #
- Added native file manager integration
- Added customisation to toolbars
Version 1.0 #
- Initial release